Growing cannabis at home can be a rewarding and exciting experience, especially for those who are interested in horticulture and plant care. If you're new to the world of cannabis cultivation and want to learn how to grow your own plants at home in NY State, this guide is for you.
Step 1: Choosing your grow space
When choosing a grow space for your cannabis plants, there are a few things to keep in mind to ensure the best possible growing environment. One important factor is the amount of space you have available. You'll need enough room to accommodate your plants and any necessary equipment, such as grow lights, fans, and ventilation systems.
Another important consideration is the location of your grow space. Ideally, you want a space that is free from distractions and can be easily controlled in terms of light, temperature, and humidity. Basements, attics, and spare rooms are all good options, as they are typically private and provide good insulation from the outside environment.
Before setting up your grow space, it's important to prepare the area properly. This may involve cleaning and disinfecting the area to remove any potential sources of contamination, such as mold or pests. You may also need to install appropriate ventilation and lighting systems, depending on the size and location of your grow space.
For those who prefer a more convenient option, pre-made grow tents are also available. These tents come in a range of sizes and can be easily set up in any room with access to electricity. They typically include all the necessary components for a successful grow, such as ventilation systems, grow lights, and reflective walls to maximize light distribution. Grow tents are a popular option for beginners as they are easy to set up and provide a controlled environment for growing cannabis plants.
Step 2: Setting up your grow space
One of the most important components of your grow space is the lighting system. You can find a wide variety of grow lights on the market, ranging from high-pressure sodium (HPS) and metal halide (MH) to light-emitting diode (LED) lights. HPS and MH lights are more affordable and emit a lot of heat, while LED lights are more expensive but produce less heat and use less energy.
Amazon is a great place to look for grow lights and other grow equipment. You can also find complete grow systems that come with everything you need, including lights, fans, and ventilation systems. These systems are designed for beginners and can make setting up your grow space much easier.
Another great feature of modern grow systems is the ability to control them remotely. You can use a smart assistant like Alexa or Google to turn your lights on and off, adjust the temperature and humidity, and control your fans. This makes it easy to manage your grow space, even if you're away from home. Warning: If your internet goes out it may affect your timers, many choose offline solutions instead.
When installing your fans, make sure to position them to create a gentle breeze that will circulate air throughout your grow space. This helps prevent mold and other issues that can arise from stagnant air. You can also use a carbon filter to eliminate odors and improve air quality.
Finally, make sure to monitor your grow space regularly and make any necessary adjustments to ensure optimal conditions for your plants. This includes checking the temperature and humidity levels, adjusting your lighting system, and watering your plants as needed. With the right setup and attention to detail, you can create a thriving grow space for your cannabis plants.
Step 3: Choosing your grow medium
When it comes to selecting your grow medium, there are several options to choose from, including soil, hydroponics, coco coir, and more. Soil is the most common and easiest for beginners to work with. A high-quality soil mix with good drainage and nutrient content is essential. However, experienced growers often use more advanced soil mixtures containing various organic components such as worm castings, composted bark, and peat moss.
Additionally, media such as perlite or vermiculite can be added to keep the soil light and improve drainage. The benefit of soil is that it provides excellent natural nutrient content, and it's easy to grow plants organically.
Hydroponics is another popular option for experienced growers. Hydroponics involves growing plants in a nutrient-rich water solution without using soil. This method is highly efficient as the plant can absorb the nutrients directly from the water solution. This process is popular because it results in faster growth and higher yields. However, hydroponics systems can be complex and expensive to set up.
Coco coir is another popular alternative to soil. It is made from the fibers of coconut husks and has excellent water retention properties. Additionally, it is an excellent source of nutrients and promotes healthy root growth. Coco coir is an excellent choice for growers who want to create a well-draining medium that retains moisture and nutrients.
When it comes to selecting a grow medium, it's essential to choose one that fits your skill level, budget, and growing preferences. High-quality soil mixes and hydroponic systems can be purchased at a variety of retail stores and online marketplaces like Amazon, while experienced growers may choose to create their own unique soil blend or hydroponic system using components like vermiculite, perlite, and nutrient-rich solutions.
Step 4: Choosing your strain
Choosing the right strain is crucial to the success of your home cannabis grow. In addition to seeds, you can also consider obtaining clones of the desired strain. Clones are cuttings taken from a mature plant and can be a great option for beginners as they have already begun the growing process. You can purchase clones from reputable sources online or from local growers.
When selecting a strain, consider your personal preferences, growing space, and skill level. For beginners, it's best to start with strains that are easy to grow and have a short flowering time. Look for reputable seed banks or clone suppliers and choose feminized seeds or female clones to ensure a higher chance of producing buds. Consider factors such as the strain's genetics, yield potential, and desired effects when making your selection. Researching the different strains available and reading reviews from other growers can also help you make an informed decision.
Step 5: Germinating your seeds
Germinating your seeds is a crucial step in the cannabis growing process. It's essential to ensure that your seeds are healthy and viable before planting them. There are several methods to germinate seeds, and one of the easiest for beginners is the paper towel method.
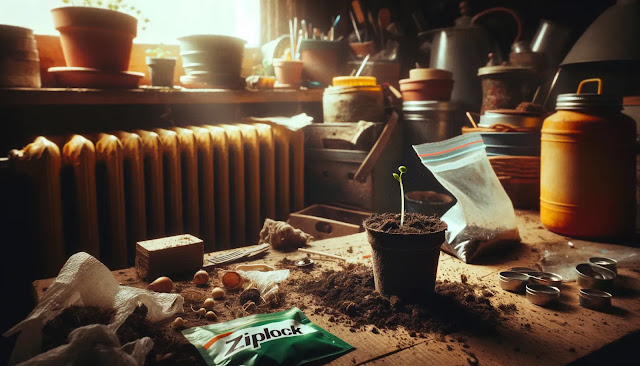
To start, place your seeds between two damp paper towels and put them in a dark, warm place. You can use a seedling tray or a plastic bag to help retain moisture. Check the paper towels every 12 hours to ensure they remain damp. It usually takes 2-7 days for the seeds to sprout, depending on the strain.
Another popular method is to place the seeds directly in soil. Soak the soil beforehand and make a hole about a half-inch deep. Place the seed in the hole, cover it with soil, and water it. Keep the soil moist and warm, and within a few days, the seed should sprout.
Some growers also use specialized germination tools like seedling heat mats or seed starters. These provide consistent heat and moisture for optimal seed germination rates.
Remember to handle your seeds with care and avoid damaging them during the germination process. By following these steps, you can ensure healthy seedlings and a successful grow.
Germinating your seeds is a critical step in the growing process, as it determines the success of your plant's growth. While the paper towel method is a simple and easy option, some seeds can be stubborn and may require additional help to sprout.
One method to increase your chances of success is to score the husk or remove the ridge of the seed with a hobby knife blade being careful not to damage the inner embryo. Another way to help stubborn seeds is to soak them in a cup of distilled water overnight before transferring them to the paper towel. This can help soften the seed coat and make it easier for the seedling to break through.
It's also important to keep in mind that not all seeds will sprout, even with the best germination techniques. Plan for some losses and plant extra seeds to ensure a successful crop. Once your seeds have sprouted, it's time to transfer them to their growing medium and continue with the next steps in the growing process.
When it comes to germinating your seeds, there are a few additional things to keep in mind. First, make sure you are using high-quality seeds from a reputable source. Older or poor-quality seeds may not germinate, no matter what method you use. Additionally, seeds prefer a consistent temperature of around 70-80 degrees Fahrenheit for optimal germination. If your space is too cold, consider using a heating pad or other heat source to keep the seeds warm.
For those using the paper towel method, it's important to keep the towels moist but not soaking wet. If they are too wet, the seeds can become moldy and may not sprout. If your seeds have not sprouted after a week, try re-dampening the paper towels or consider using a different germination method.
Lastly, consider using a germination hormone to boost your success rate. These hormones contain cytokinins, which stimulate cell division and growth. You can find these hormones at most gardening stores or online.
By following these tips, you can increase your chances of successful seed germination and start your cannabis grow off on the right foot.
Step 6: Transplanting Your Seedlings
Transplanting your seedlings is a crucial step in the cannabis growing process as it sets the foundation for your plant's growth. This step involves moving your seedlings from their germination container to a larger container where they will grow until harvest.
When transplanting, it's important to use a high-quality soil mix to ensure the best growth for your plants. A high-quality soil mix should be well-draining, have a balanced pH level, and be nutrient-rich. Some growers prefer to make their own soil mix, while others opt for pre-made soil mixes available at gardening stores.
It's also essential to choose a container with good drainage to avoid water-logging the roots. Many growers prefer fabric pots for their excellent drainage, which allows for air pruning, where the roots are exposed to air, preventing them from becoming root-bound.
Before transplanting, prepare your new container by filling it with soil mix and making a hole in the center. Gently remove your seedling from its previous container, taking care not to damage the delicate roots. If the roots have become tangled or are overcrowded, gently tease them apart to encourage healthy growth.
Place the seedling in the hole you made in the new container, taking care to cover the roots with soil mix. Water the soil gently, making sure not to over-water as this can cause the soil to become waterlogged.
After transplanting, it's essential to take care of your seedlings to ensure they thrive in their new environment. Place them in a warm and well-lit area, making sure to monitor the temperature and humidity levels. It's also important to adjust the pH level of your soil mix to ensure your plants can absorb nutrients effectively.
One important tip to remember is to gradually increase the intensity of light exposure as your plants grow. Start with low-intensity light for the first few days after transplanting and gradually increase it as your plants adapt to their new environment.
Overall, transplanting your seedlings can be a daunting task for new growers, but it's a crucial step in the cannabis growing process. By using high-quality soil mix, a well-draining container, and taking care of your seedlings after transplanting, you can set your plants up for successful growth and a bountiful harvest.
Step 7: Vegetative Growth
After successfully transplanting your seedlings into their final growing containers, it's time to enter the vegetative growth phase. This phase is crucial for your plant's overall health and development, as it is the stage when your plants will grow leaves and stems before flowering.
To begin, it is important to provide your plants with the proper light and environmental conditions. During the vegetative phase, cannabis plants require between 18-24 hours of light per day. You can achieve this using a grow light or by placing your plants outside in a sunny location. If you're growing indoors, be sure to adjust your grow light to the proper distance from your plants to avoid burning or stressing them.
Along with proper lighting, maintaining the right temperature and humidity levels is also crucial. Aim to keep the temperature between 70-85°F during the day and around 10°F cooler at night. Relative humidity should be between 40-60%. If the humidity is too high, it can cause mold and mildew, while low humidity can lead to dehydration and stunted growth.
As your plants begin to grow, you will need to consider their nutritional needs. There are several options for fertilizers, including organic and synthetic options. Organic fertilizers, such as worm castings or bat guano, are derived from natural sources and provide essential nutrients to your plants. Synthetic fertilizers are made in a lab and are often more concentrated and readily available to the plant. However, they can also be harsh and lead to nutrient burn if not used properly.
Additionally, many growers use supplements to enhance plant growth and health during the vegetative phase. These can include products containing beneficial bacteria and fungi, such as mycorrhizae, which aid in nutrient uptake and root development.
It's also important to consider pruning and training your plants during the vegetative phase. Pruning is the act of removing specific parts of the plant, such as branches or leaves, to promote more focused growth and increased yields. Training, on the other hand, involves manipulating the plant's growth patterns to create a more even canopy and increase light penetration. Common training techniques include topping, which involves cutting off the top of the plant, and low-stress training, which uses bending and tying techniques to create a flat, even canopy.
The vegetative growth phase is a crucial stage in the growth cycle of your cannabis plants. Be sure to provide your plants with the proper lighting, temperature, and humidity levels, as well as the necessary nutrients and supplements to promote healthy growth. Consider pruning and training techniques to maximize yields and create an even canopy. With proper care and attention, your plants will thrive during the vegetative phase and be ready to enter the flowering stage in due time.
Step 8: Nutrient and water management
One of the most critical aspects of growing healthy cannabis plants is proper nutrient and water management. During the vegetative growth phase, your plants will need a balanced supply of nutrients and water to develop strong stems, healthy foliage, and a robust root system.
Nutrient Management
Cannabis plants require a range of nutrients, including nitrogen (N), phosphorus (P), and potassium (K), as well as secondary macronutrients like calcium (Ca), magnesium (Mg), and sulfur (S), and trace elements like iron (Fe), zinc (Zn), and copper (Cu).
The most common method of providing nutrients to your plants is through liquid fertilizers. Many high-quality nutrient solutions are available on the market, and choosing the right one can be overwhelming for a new grower. It's essential to choose a nutrient solution specifically designed for cannabis and that contains the right ratios of macronutrients, secondary macronutrients, and trace elements needed for healthy plant growth.
When using a liquid fertilizer, it's crucial to follow the manufacturer's instructions carefully. Over-fertilizing can cause nutrient burn, which can stunt growth or even kill your plants. Under-fertilizing can also cause deficiencies, which can weaken your plants and reduce yield.
In addition to liquid fertilizers, some growers prefer to use organic fertilizers, which can provide a slower release of nutrients over a more extended period. Organic fertilizers like compost, worm castings, and bat guano are all excellent choices for providing essential nutrients to your plants.
Water Management
Water is another critical component of successful cannabis cultivation. Your plants need water to absorb nutrients and maintain their structure, and maintaining the right moisture levels is essential.
Over-watering can cause root rot, while under-watering can cause your plants to wilt and die. It's essential to strike the right balance between too much and too little water.
When watering your plants, it's crucial to use pH-balanced water. Cannabis plants prefer a slightly acidic environment, with a pH range between 6.0 and 7.0. Water with a pH outside of this range can prevent your plants from absorbing nutrients properly, leading to deficiencies.
There are several options for providing water to your plants, including watering by hand or using a drip irrigation system. Hand watering can be time-consuming but allows for more control over the amount of water your plants receive. Drip irrigation systems are an excellent option for larger grow operations and provide consistent moisture levels to your plants.
In addition to regular watering, some growers use foliar feeding, which involves spraying a nutrient solution directly onto the leaves of your plants. Foliar feeding can be an effective way to provide your plants with a quick nutrient boost and can also help combat nutrient deficiencies.
Proper nutrient and water management are essential for growing healthy cannabis plants. By choosing a high-quality nutrient solution and maintaining proper watering practices, you can ensure that your plants receive the nutrients they need to thrive. Remember to monitor your plants regularly and adjust your watering and nutrient schedules as needed to achieve the best results.
Step 9: Training and Pruning
Training and pruning your cannabis plants is an essential step to help maximize yields and achieve an even canopy. By manipulating the growth of your plants, you can encourage them to produce more buds and increase overall productivity. There are various techniques you can use to train and prune your plants, each with its own advantages and disadvantages.
One of the most popular techniques is topping, where you remove the top of the main stem to encourage the plant to grow two new main colas. This technique helps to create a bushier plant with multiple tops, which can increase yields. However, it can also slow down vegetative growth and delay flowering.
Another technique is pruning, where you selectively remove leaves and branches to improve light penetration and air circulation. This can help prevent mold and mildew and promote healthier growth. However, pruning too much can stress your plants and reduce overall yields.
Low-stress training (LST) is another technique that involves gently bending and tying down branches to encourage them to grow horizontally instead of vertically. This technique helps to create an even canopy, which improves light distribution and encourages bud growth. LST can be done using strings, wires, or plant ties.
Other techniques you can use include super cropping, which involves gently bending and breaking the stems to promote lateral growth, and defoliation, where you remove some of the larger fan leaves to improve light penetration and air circulation.
It's essential to note that training and pruning can be stressful for your plants, so it's important to take it slow and be patient. It's also crucial to keep your plants healthy by providing them with proper nutrition and watering. Always use clean tools to avoid introducing any pests or diseases to your plants.
By using these techniques, you can help your plants grow in the desired shape and size, promote even growth, and increase yields. However, it's important to experiment with different techniques and find what works best for your particular strain and growing environment.
Step 10: Flowering stage
During the flowering stage, your plants will require a different set of care and attention than during the vegetative phase. Here are some tips to help you get the most out of your plants during this stage:
Lighting: As mentioned earlier, it's essential to provide your plants with 12 hours of light per day during the flowering stage. Make sure to keep the light schedule consistent and avoid any interruptions to the dark cycle, as this can stress your plants and lead to lower yields.
Temperature and humidity: During the flowering stage, it's crucial to keep the temperature and humidity levels in the optimal range to ensure healthy growth and high-quality buds. Aim for a temperature range of 65-80°F and a relative humidity of 40-50%. High humidity levels can lead to mold and mildew, while low humidity levels can cause the plants to become stressed.
Nutrients: Your plants will require a different set of nutrients during the flowering stage than they did during the vegetative phase. Use a high-quality bloom nutrient solution to provide your plants with the right balance of nutrients for healthy growth and maximum yields. Be careful not to over-fertilize, as this can lead to nutrient burn and other issues.
Flower development: During the flowering stage, your plants will go through several stages of flower development. It's important to monitor your plants closely and adjust your care accordingly. As your plants develop buds, make sure to support the weight of the branches to prevent breakage. You can use trellises, stakes, or other support structures to help keep your plants upright.
Harvesting: Knowing when to harvest your plants is crucial to getting the best possible yield and potency. Look for signs of maturity, such as the color of the pistils and trichomes, to determine when your plants are ready for harvest. Harvesting too early can lead to lower yields and less potent buds, while harvesting too late can lead to a decrease in potency and flavor.
The flowering stage is a critical time in the cannabis growing process. By providing your plants with the right amount of light, temperature, humidity, and nutrients, you can ensure healthy growth and high-quality buds. Remember to monitor your plants closely and adjust your care as needed to maximize your yields and potency.
Step 11: Harvesting and Drying - Turning Buds into Usable Cannabis
Harvesting and drying your cannabis plants is the last crucial step in the growing process before you can finally enjoy the fruits of your labor. It's essential to handle your plants carefully during this stage to preserve their potency, flavor, and aroma. Let's dive into the details of harvesting and drying your cannabis buds.
Harvesting: When your plants are ready to harvest, it's time to cut them down. This usually happens after 8-12 weeks of flowering, but it can vary depending on the strain you're growing. To check if your plants are ready, look at the trichomes under a magnifying glass. When the trichomes are mostly cloudy or amber, it's time to harvest. Cut the plants at the base, and remove the large fan leaves. You can hang the plants upside down to dry, or trim the buds first and hang them on a drying rack.
Drying: Once you've harvested your plants, it's time to dry the buds. This process can take anywhere from 7-14 days, depending on the humidity in your drying space. The ideal environment for drying is a cool, dark, and dry room with a temperature between 60-70°F and humidity around 50%. Hang the buds upside down on a drying rack or a string, making sure there is plenty of space between the buds to promote airflow. You can also use a fan to circulate the air and help prevent mold growth.
Trimming: After the buds have dried, it's time to trim them. This involves removing the excess leaves and stems, leaving only the buds. This process can be time-consuming, but it's important to ensure the best flavor and potency of your cannabis. You can use scissors or pruning shears for trimming. Some people prefer to leave more leaves on their buds for a different flavor profile, but others prefer a cleaner look with fewer leaves.
Curing: After trimming, it's time to cure your buds. This process helps to remove excess moisture and improve the flavor and aroma of your cannabis. Place your trimmed buds in an airtight container like a mason jar, and store it in a cool, dark place. Open the jar once a day for the first week, then every few days for the next few weeks. This allows fresh air to circulate, but not too much that it will dry out the buds too quickly. Curing can take anywhere from 2-8 weeks, depending on your preference.
Harvesting and drying your cannabis buds is a critical step in the growing process, and it's important to do it carefully and correctly to get the best results. By following these steps, you can ensure that your cannabis buds are potent, flavorful, and ready to enjoy.
Step 12: Storing, Consuming, and Enjoying Your Cannabis
Congratulations! You have successfully grown and harvested your own cannabis. The final step is to ensure proper storage and consumption for maximum enjoyment. In this section, we'll discuss the importance of proper storage and explore the different ways to consume cannabis.
Storing Your Cannabis Proper storage is crucial to maintaining the quality and potency of your cannabis. Store your buds in an airtight container, such as a mason jar, and keep it in a cool, dark place, away from moisture and light. If you want to get even more precise, you can use specialized storage containers designed specifically for cannabis, such as UV-blocking jars and humidity control packs. Remember to label your containers with the strain and date of harvest, so you can keep track of what you have and when it was harvested.
Consuming Your Cannabis Now that you have successfully grown and stored your cannabis, it's time to enjoy it. There are several methods of consumption to choose from, each with its own unique benefits and effects.
Smoking is the most common and straightforward method. You can roll your own joints, use a pipe or a bong, or try a pre-rolled joint. Vaporizers are another popular option. They heat the cannabis without burning it, producing a vapor that is inhaled.
Edibles are a tasty and discreet option. They come in various forms, such as gummies, chocolates, and baked goods. Remember that edibles take longer to take effect and can be more potent than smoking, so start with a low dose and go slow.
Tinctures are liquid extracts that can be taken sublingually (under the tongue) or added to food or drinks. They are a good option for those who want a fast-acting and discreet method of consumption.
Topicals are cannabis-infused creams, balms, and lotions that are applied directly to the skin. They are non-psychoactive and can be used for localized pain relief and inflammation.
Legal considerations for growing cannabis in NY State
When it comes to growing cannabis in NY State, there are certain legal considerations that growers must be aware of. In addition to the limit of 3 mature and 3 immature plants per adult for personal medical use with any required paperwork on file, there are also rules regarding the location and visibility of the plants. It's important to note that the plants must be kept in a secure location that is not visible from any public place.
In addition, there are restrictions on the amount of cannabis that an individual can possess. In NY State, adults are allowed to possess up to 3 ounces of cannabis for personal use, and up to 24 grams of concentrated cannabis. However, it is important to note that these limits apply only to individuals and not to multiple people living in the same household.
It's also important to be aware that while growing cannabis for personal use is legal (in some situations with a medical card), it is still illegal to sell or distribute cannabis without a license. This means that any excess cannabis that is grown cannot be sold or given away. In addition, there are specific regulations for obtaining a license to sell cannabis, including background checks and meeting certain requirements.
Another legal consideration for growing cannabis in NY State is the potential impact on one's employment. While cannabis is legal for personal use, it is still illegal under federal law, and some employers may have policies prohibiting its use. It's important to be aware of these policies and the potential consequences before using cannabis, whether for personal use or medicinal purposes.
Finally, it's important to note that while cannabis is legal for personal use in NY State, it is still illegal in many other states and countries. This means that it is illegal to transport cannabis across state or international borders, and doing so can result in serious legal consequences.
While growing cannabis for personal use is legal in NY State (with a medical card), there are several legal considerations that growers must be aware of. It's important to stay up-to-date on the latest laws and regulations regarding cannabis, and to always use cannabis responsibly and legally.
Conclusion:
Growing cannabis at home can be an exciting journey for those interested in horticulture and plant care. By following the steps outlined above, you can become an expert home grower and enjoy the benefits of cultivating your own high-quality cannabis. However, it's important to remember that growing cannabis also requires patience, dedication, and knowledge. To ensure a safe and responsible experience, always prioritize safety and comply with your local laws and regulations. And when it comes to consuming your cannabis, remember to do so in moderation and with caution. With the right approach, growing your own cannabis at home can be a fulfilling and rewarding experience.